Pages

Tuesday, May 29, 2012

Mudslides!

 If only these were the kind of mudslides mother nature sent to wreak havoc on our world! Divine, chewy cookies with not one, not two but THREE types of chocolate. Ooooo la la! The only victims these mudslides may have are your waistline (that is if you eat too many, which is really easy to do)! I got this recipe from one of my favorite websites, http://www.marthastewart.com/.
The three types of chocolate used in these cookies are unsweetened, semi-sweet and milk chocolate. The picture on the right shows all three chocolates together. If you look closely (no drooling please) you can see differences in how dark the different chocolates are. To the left is milk chocolate, the one that is lightest brown in color. In the middle is unsweetened chocolate (dark brown blocks) and to the right is semi-sweet. I like to view chocolate (the types used in baking) as a spectrum. At one end is unsweetened, essentially raw, chocolate and at the other end is milk chocolate. In-between the two is semi-sweet and bittersweet chocolate. I'm sure most of you know that there are distinct flavor differences between these types of chocolate as well. So what accounts for the differences in flavor and color as you progress through the "chocolate spectrum?" Well, in case you didn't know....

Chocolate comes from cacao trees grown in tropical climates around the world. Cocoa beans are the seeds found inside of the fruit of cacao trees. The raw beans have a very bitter and intense flavor to them. After fermentation, the beans go through a variety of processes involving roasting and hulling. The hulling separates the shell from the nib which is the part of the bean used to make chocolate liquor. Chocolate liquor is the primary component of unsweetened chocolate. It is raw, minimally processed chocolate: grounded nibs from roasted cocoa beans. Thats why if you've ever tasted unsweetened chocolate by itself, you probably didn't like it much. It was probably very bitter and over-powering.

In fact, the word chocolate is derived from a Nahuatl (an ancient Aztec language, I believe it is pronounced nah-waddle) word that meant "bitter water." The other types of chocolate such as semi-sweet and bittersweet are made by combining chocolate liquor with varying amounts of sugar, cocoa butter (a vegetable fat from the cocoa bean and yes its like whats used to help heal those nasty stretch marks), and sometimes vanilla extract. As you might have guessed bittersweet chocolate has less sugar and more chocolate liquor (raw cocoa) in it, thus giving it a more bitter flavor." Milk chocolate, obviously, has milk added to it. This is why it has a lighter color and more mild, sweeter flavor. For more information on the from-tree-to-cookies chocolate process, I recommend the following Hersey's website: http://www.hersheys.com/discover/chocolate.asp

So now we've taken our journey through the chocolate spectrum. Back to our cookies. The unsweetened, semi-sweet and milk chocolate flavors blend together to create a rich chocolatey taste that is "OUT OF THIS WORLD" as friend described them. The first step in making these cookies is to combine the unsweetened and semi-sweet chocolate and melt them over a double boiler.
As usual when melting chocolate be sure not to crank the heat up too high and to stir frequently to avoid scalding the chocolate. You also don't want the heat so high that the water boils and steam starts seeping through the sides of your bowl.  If ANY water comes in contact with the chocolate, it will get lumpy and curdley...yuck!  In the mean time, you are to beat the eggs, sugar and vanilla. It should look light and fluffy. Next you add the melted, COOLED chocolate. Its important to cool the chocolate. If you add it into the eggs when the chocolate is too hot, you could end up with scrambled eggs. I've never had chocolate scrambled eggs but I'm guessing its not very appetizing... Once those are combined you slowly mix in the flour and then finally the milk chocolate. Saving the milk chocolate and adding it last ensures that the cookies have chocolate "chunks" in them. YUMMY! Then you just scoop and bake! Here's a tip: the recipe calls to bake these at 400. I believe that is too high, at least it is for my oven. I recommend 350-375 to prevent burning on the bottom. These make great chocolatey treats for your friends, family and co-workers for Valentine's day! Make them yourself or if you don't have time- don't forget I take orders! Happy baking!

Saturday, April 28, 2012

Birthday Cake!

This weekend I had the opportunity to make a birthday cake for a little boy turning one years old!  It was a dinosaur cake!  For this cake I used a Wilton cake mold.  The cake and frosting were made completely from scratch.  The cake recipe was your standard 1-2-3-4 cake recipe and the frosting was butter-cream.  I've posted before about the butter-cream icing recipe I use here.
Cakes like this can be time consuming but careful preparation can drastically reduce the amount of work.  First,  carefully read through the instructions ENTIRELY before you begin.  This will help you plan ahead and decide how much cake and frosting you need as well as which colors and tips you need for decorating.  If you are using a specific cake mold and have the instruction booklet, it usually details this information for you.  I suggest making the frosting ahead of time.  The above butter-cream icing recipe can be stored for up to a week in the refrigerator in a sealed container.  If you are doing a cake that uses a lot of colors, be sure to make sure you have all the right colors before hand.  I also suggest purchasing disposable piping bags (you don't want to have to stop and wash out a piping bag when changing colors).  It's also helpful to tint your frosting ahead of time.  Divide out your frosting into the amounts you will need for the different colors (again the instruction booklet should spell this out) and tint them to the desired colors.  I suggest not tinting the frosting until about one day ahead of time.
Its a good idea to make the cake the day before, and allow it to set out over night so it can cool completely.  That way, the morning of "cake day," everything is done except to ice the cake.  This makes the whole process a lot easier.

A few more tips:
  • Always a good idea to have some extra frosting on hand in case you mess up
  • Be sure you thoroughly grease and flour the cake pan, or use a cake release spray
  • Allow the cake to cool completely before attempting to ice
  • If the icing becomes too runny and difficult to work with, stiffen it up by placing it in the refrigerator for 10-15 minutes
  • Do the outline of the cake before filling it in.  Also, try to work from the inside out.  Get the parts in the center of the cake before you move to the outside.  The sides should be the very last thing you do.
So these types of cakes be intimidating and seem like tons of work but if you break it out into steps and are methodical in your approach, it makes things a lot easier (especially for us domestically inept people).  If you can't bring yourself to tackle the challenge, pay a friend to do it for you =).

Monday, April 23, 2012

The Hearty Sage

The other day I was throwing some kitchen scraps on the compost pile when I caught a glimpse of something truly shocking!  I looked over and what to my wondering eyes did appear but a fairly large and budding sage plant!  The reason this is so shocking is because of where it was growing.  Our compost pile is in the very back corner of our yard, behind several tall bushes.  It is completely shaded.  And there, in the middle of all that shade and undeveloped terrain...grew a hearty sage.  What is even more amazing is the fact that this sage was a cast off from last year.  I had bought it on clearance (I think I mentioned before I never by plants unless they are on clearance) and did an excellent job killing it in the ensuing months.  By October, I had given up all hopes on my impulse purchase and relegated it to the compost pile.  I now know that my husband (being the sneaky little miser he is) came along a few days later and plopped it into the ground right at the edge of the compost pile.  I never noticed until the other day....what a pleasant surprise!
Sage, like most herbs, typically likes full sun.  Although it has come back rather nicely in its current spot, I don't believe it can truly flourish there.  So I made the decision to move it to one of my vegetable garden beds.  I chose the "cool crop" bed where I grow my parsley, lettuce and cauliflower. I have been reading a lot about companion planting lately and found that sage helps repel cabbage moths, beetles and carrot flies (which can attack parsley).
I also decided to try and grow a few more plants from "cuttings."  Most herbs (with the exception of parsley and thyme) are notoriously hard to grow from seed.  One of the best ways to propagate herbs is to do so via "cuttings."  Last year I posted about growing basil from cuttings.  The process is virtually the same for sage.  You want to take a 4 to 6 inch cutting of the plant.  For sage, be sure not to cut a "woody" part.  Remove the bottom several leaves by snipping them with pruning shears.  These will eventually form the new roots.
You can then root the plant by placing it in a glass of water in a sunny location (takes about a week for roots to form) or placing it in some rooting medium (such as sand, vermiculite or even potting mix).  If you do use potting mix, I recommend a kind that contains high levels of phosphorus for better root development.  Its usually best to keep the cuttings indoors until they are firmly established, then you can try and move them outside.
Sage makes a great addition to your vegetable or herb garden.  It also looks fabulous in your regular flower beds.  It produces a nice, bushy, elegant plant.  Make a bunch of sage cuttings and then give the plants away to friends and family!

Monday, April 16, 2012

....And We're Back!

I cannot believe its been three months since I last updated this blog.  I am so sorry!  My reasons being...one part laziness, two parts business and one part I lost my camera!  Thankfully my father-in-law came to the rescue and gave me one of his old cameras so we are back in business!
I thought I would take this opportunity to show you whats going on around the homestead.  Due the mild winter and unusually warm March, the garden beds are already in full swing!  I've been spending the last few weeks preparing my vegetable beds and even have some early crops in one of them.  I have two 8' x 4' cedar raised beds (courtesy of my hubby and his mad carpentry skills).  The back bed has cool weather crops such has cauliflower, lettuce, spinach, radishes and parsley.  I started all of those from seed in late February/ early March.  We have already enjoyed some tasty lettuce!
The front bed I'm reserving for my tomatoes, peppers, eggplant and basil.  I started all of those from seed too and they are growing happily indoors!  I'm hoping to get them out by the end of April or beginning of May.
As I said earlier, I've been preparing my vegetable beds.  By that I mean I've been performing soil tests and adding a layer of blended compost and manure to the top of the beds.  Burpee makes a really cheap, easy soil test kit.  It allows you to test soil pH, nitrogen, phosphorus and potassium to see if there are any deficiencies.  (And no I'm not receiving any kickbacks from Burpee for promoting their product, which would be nice).  The tests are very easy to perform and can be done in 10-15 minutes.  First you gather soil samples from around the garden bed you are testing.  The samples need to be below the surface several inches (where the plants roots would be).  You mix the samples together and then take a small amount and put it in the mini test tube.
Then you add the capsules with the test reagents, add a little water (straws make nice pipettes), shake and wait.  
The pH of my soil came out to be neutral to slightly alkaline.
Depending on what you want to plant, you may want to adjust the pH.  Most vegetables and plants do well in neutral soil.  Some plants prefer more acidic soils, such as azaleas and hydrangeas (if you want them blue).  I have an "acidic" bed in the front of my house where I keep an azalea and  hydrangea.
Every spring and fall I treat the soil to very slowly bring down the pH.  You don't want to do it too fast or it will shock the plants.  The azalea pictured is a crimson azalea, that produces beautiful crimson blooms every spring.  It usually doesn't bloom until May but just yesterday I saw a few blooms open up...
The rest of the garden beds are doing just as well.  Here is a picture of the "dead nettle" we have planted under a tree with shallow roots.
As you can see it is going to town!  It makes excellent ground cover in shady areas.  Don't give it too much sun or it will poop out on you!  I think its called "dead nettle" because just when you think its dead and its not coming back, it really surprises you!  Here is another picture of a shade garden out by our shed.  The coral bells and astilbe are growing vigorously, as are the hostas.

So far, the garden is coming along!  So what are YOU planting this year?

Monday, January 16, 2012

A Domestically Inept Bread Primer: Part 1

If you may recall, back in my angel food flop post I talked about my dear friend Ashley and mentioned that she got me a wonderful Christmas present despite the fact I totally screwed up her birthday cake.  None the less, she, being the good friend she is, got me a wonderful cookbook that I've been longing for!  She got me George Greenstein's Secrets of a Jewish Baker.  This is a fabulous book about bread!  Even if you are a newbie (or domestically inept) home baker, you too can appreciate the recipes and secrets poured out in this book.  I have quite a few bread books.  To be honest most of them are quite daunting (no offense Peter Reinhart- I still think you are a genius).  This book is different.  It introduced me to a whole new level of bread baking.  Though steeped in tradition, it beautifully weaves newer trends and tastes into the practice of old-school bread-making.

Wednesday, January 11, 2012

Jammin' in January

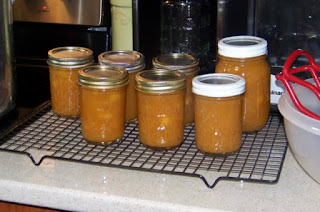
Who says canning is only for summertime?  Well not me!  This past weekend my friend Katy and I made and canned a bunch of peach and cherry jam using produce we had frozen from the late summer.  Canning can be kind of an overwhelming process....Especially if you are doing something like peaches that requires you to remove the skins and cut the fruit beforehand.
Here's what we did: in late summer, during prime peach season, Katy purchased a whole lot of peaches from a local farm.  We then spent one after noon removing the skins, pitting and slicing up the peaches and froze them in 6 cup batches.  (If you don't know how to easily remove peach skins, see my post about removing tomato skins, its the exact same process)!  It would have been quite daunting to do all of that and then proceed to make jam and can all of them in one day.  On another day Katy also pitted and froze a bunch of cherries for the same purpose.  We froze them knowing that someday....we would get around to actually jammin' and cannin'.

Saturday, January 7, 2012

Spring is in the air?????

We have had some unusually warm weather here in Ohio.  Granted we've had a few days of freezing temperatures, but overall the winter has thus far been very mild.  Yesterday, the temperature was pushing 60 and there was a hint of spring in the air...even though it's only been winter officially for a few weeks.  Unfortunately my plants are getting a little confused.

Wednesday, January 4, 2012

Custom Handmade Gift Bags

Well Christmas is over now and most of you don't even want to start thinking about Valentine's day.  After all, it's still over a month away.  Well, if you start now, you can have an inexpensive and adorable gift for all your sweeties on Valentine's day.  These custom gift bags are so easy to make that even a domestically inept person who has no sewing skills can do it!  I promise!   Just fill these adorable bags with goodies (candy, soaps, lotions etc.) and the ones you love will feel so special for receiving something handmade! Tired of giving the same old cheesy gifts just for the sake of giving a gift?  Handmade gifts are by far the best you can give!  Knowing someone took the time and energy to create something, with your interests in mind is a delightful thought.  I gave a bunch of the above snowman bags to my co-workers for Christmas and filled them will small, inexpensive trinkets.  Everyone loved them!  I think they liked the bags more than what was actually in the bags.  So today I'm going to teach you how to make these.  But don't let the fun stop here!  Engage your creativity!  There are so many possibilities with these gift bags!

Sunday, January 1, 2012

Cauliflower Soup

Here in Ohio, we are starting the New Year off with a cold snap.  We have had a very mild December but January might be a different story.  The temperature dropped 20 degrees today and we are having heavy winds and rain.  Obviously, too treacherous to venture outside...so as I was holed up indoors today and shivering from the cold, I decided it was a good day for soup.  I had a head of cauliflower in the fridge I needed to get rid of so I set out to make some delicious and very nutritious cauliflower soup.