Pages

Wednesday, August 24, 2011

Mom's Award Winning Chili

The other day there was just a "hint" of fall in the air.  Picture for yourself a delightful mixture of cool morning temperatures, back to school buzzing all over town, and pots of hardy mums bursting forth with color and dotting every shop corner.  I live for fall.  It's the most fabulous time of year.  I love everything about it...especially football season!  And where there is football, chili inevitably follows.  
So it was in such a setting one morning that I decided to put on a pot of chili.  Not just any chili...my mom's AWARD WINNING chili.  I'm not sure what makes it so special but for me its the best chili out there and no matter how hard I try, I can never seem to get it just the way mom makes it.  She was kind enough to allow me to share her recipe.  So I hope the next time you decide to make some chili, you'll give this recipe a try.
This is a great recipe because its sooo easy and it's made in the slow cooker!  If you haven't discovered the joy's of slow cooker cooking....then I suggest you do!  There is nothing like coming home from  a hard day at work and finding dinner....already made!  Hot and ready to go!  

Mom's Award Winning Chili
Ingredients:
These are the brands I like to use!

  • 1.5 lbs ground beef
  • 1 pkg of McCormick Original Chili Seasoning
  • 1 large can (46oz) of tomato juice (you won't use all of it)
  • 1 can (14.5 oz) of petite diced tomatoes with green chilies
  • 1 can (14.5 oz) of chili beans
  • 1 jar medium salsa
  • 1-2 tsp chili powder
  • 1-2 tbsp brown sugar
  • cayenne pepper, salt to taste
Instructions:
  • Brown the beef in a large skillet over medium heat.  Drain fat.
  • Place all the ingredients in a large slow cooker and stir well.  Only add about half of the tomato juice.  You can add more later if necessary...depending on how liquid-like or chunky you like your chili.
  • Let the chili sit on low in the slower cooker over several hours.
  • Serve with fresh cornbread or oyster crackers!

Sunday, August 21, 2011

Hooray for Hummingbirds!

If you don't already have a hummingbird feeder, I highly suggest you get one.  They are very low-maintenance and rewarding.  I have one right outside my kitchen window, and it brings me such joy to sit and look out the window and see hummingbirds all day!  I have a pair of ruby-throated hummingbirds that must have a nest nearby because I see them throughout the day.  They are constantly feeding!  I keep trying to catch pictures of them but as you can probably imagine it's next to impossible.  
I often see hummingbird nectar for sale in the store and for the life of me I cannot fathom why anyone would ever BUY hummingbird nectar.  It is extremely easy to make yourself at home.  Usually when you see it in the store it is tinted red to help attract the hummingbirds.  Well if you decide to make your own you can add red food coloring to it OR you can just buy a hummingbird feeder that is already red.  That way, you never have to worry about dying your homemade nectar.  The one you see above in the picture was less than $10.00 and I've had it for several years now.  So here is how you make hummingbird nectar:


Step One: measure out 1 parts sugar to 4 parts water.  In this case I did 1/2 cup sugar to 2 cups water

Step Two: place them both in a sauce pan and heat them together over medium-low heat.  Stir occassionally and heat just until all the sugar is dissolved.

Step Three: allow to cool, then fill the feeder!  

It's that easy!  Really!  See why I can't imagine anyone would want to buy nectar?  Make it yourself!  I guarantee you have the ingredients...  
   

Thursday, August 18, 2011

Homemade Black Bread

Ever wonder how restaurants make that delicious dark bread that they bring out before the meal?  How do they get it so soft, chewy and dark?  Is it the flour they use?  No....its not the flour.  Dark breads usually have one or more of the following ingredients: cocoa powder, instant coffee and caramel coloring.  Don't you feel cheated?  That's it.....that's where the dark color comes from.  
Today I'm going to share with you how you can make this bread at home yourself.  This bread is wonderful to make for dinner parties.  It's actually one of the shorter, easier breads to make.  You will have to start in the morning though to give yourself enough time to make it.  I like to serve it with an assortment of sides such as cinnamon-sugar butter, peach jam, and apple butter.  Your guests will be wanting more!
The recipe I use for this bread is the Honey Wheat Black Bread recipe found on the King Arthur Flour website.  In case you haven't caught on, I'm a big fan of King Arthur flour.  They simply are the best.  Try them....you'll never want to bake with anything else.  

King Arthur's Honey Wheat Black Bread:

Ingredients:
  • 1/2 cups of warm water (warm but not uncomfortable to the touch)
  • 2 tbsp unsalted butter, softened
  • 1/2 cup honey (I encourage using local honey)
  • 2 cups King Arthur Unbleached Bread Flour
  • 1 2/3 cups King Arthur Whole Wheat Flour (the recipe calls for their White Whole Wheat Flour but I just use regular Whole Wheat Flour and its fine)
  • 1 tbsp cocoa (I use dutch-process but whatever)
  • 1 tbsp sugar (I like to use raw cane sugar, the maple in it adds a little more dimension to the taste)
  • 2 tsps instant coffee 
  • 1 1/2 tsp coarse salt
  • *1 tbsp powdered caramel color (I never put this in because I have no idea where to get it and I don't like adding color to stuff if I don't have to)
  • 2 tsps instant yeast

Instructions (how I do it, slightly different from their directions):
  • In the bowl of an electric mixer, cream together the butter and sugar 
  • In a separate bowel mix together the dry ingredients: both flours, salt, cocoa powder, coffee and yeast
  • With the mixer on low, add the dry ingredients to the butter/sugar
  • Once they are combined, make a well in the center and add the water and honey
  • Using a dough hook, turn the mixer on medium-high speed and start mixing the dough
  • It will be a wet and shaggy dough.  
  • Knead using an electric mixer for about 10 minutes
  • Side note: I find I usually have to add a few more tablespoons of flour during the kneading process.  Otherwise the dough is just too slack (wet) to work with
  • Once the dough is kneaded, transfer to an oiled bowel.  It will be very slack.  It helps to oil or flour your hands to transfer it.
  • Cover the dough with a damp dish towel and let rise for at least an hour.  I usually let it go 2-3hrs (because hey, I'm busy)
  • After its doubled in size, dump the dough onto a lightly floured surface
  • You can then shape the dough how you like.  The original recipe calls for making six "mini loaves."  In this instance, I just made two smaller loaves.
  • Once the loaves are shaped how you want them, rest them on a parchment lined baking sheet and cover with a damp dishcloth for 1 hour (I wouldn't go much past one hour, otherwise the dough will spread too much)
  • After the dough has rested ~1 hour, but the pan in a pre-heated oven at 350 F (If making a larger loaf I suggest increasing the temp to 375 F).  Depending on the size of the loaves you are making it can take 25-40 minutes for the bread to bake.  I split this dough in half and made two loaves, so it took about 35 minutes.  Smaller loaves would take a shorter amount of time
  • Side note: this bread gets very brown in the oven.  You may want to keep an eye on it and with about 10 minutes left in the baking process, "tent" the bread with some aluminum foil to keep the surface from browning too much.  
  • Keep in mind this bread won't get really "hard" like other breads in the oven.  Its a very soft bread.  Yummy!

Monday, August 15, 2011

A Little Sunday Morning Detox....


The most wonderful thing happened to me yesterday!  One of my dear friends and coworkers surprised me with a box of Ceylon Mixed Teas!  Tea is one of my most very favorite things.  Perhaps its my English ancestry but I find that nothing warms, comforts and heals quite like a cup of tea.  Deciding which flavor to try first took some time but after mulling it over I decided to go for the green tea.  I think its fitting.  After all, Sunday is the first day of the week; a day for renewal, rest and reflection. What better way to cleanse the mind and body than with a cup of green tea? 
The beneficial effects of green tea have long been purported.  I'm happy to see that they are starting to be taken seriously by the medical community.  Green tea has been used for thousands of years by eastern Asian cultures to cure everything from headaches to heart problems.  We know now that Green Tea is full of powerful antioxidants that scavenge free radicals in the body (unstable elements that destroy tissue) which could potentially help prevent a variety of ailments including heart disease, diabetes and dementia.  Ito En is a Japanese Tea Company renown for their exceptional quality of products.  They have an excellent website detailing some of the history, health benefits and varieties of tea.  Check it out!
Corsican Mint I have planted in my garden
One of the other great tea flavors in this pack was peppermint.  I just started drinking peppermint tea but I think it's fair to say I'm hooked!  The wonderful thing about peppermint tea is that it is very cleansing to the palette.  I suggest serving it at a dinner party, between the main course and dessert.  It would be such a unique way to transition your guests from one dish to the other.  The reason it works so well is that peppermint has been used traditionally as a digestive aid.  It speeds up stomach emptying and improves the flow of bile, which help digest fats.  
It would be easy to sit here and talk about tea all day.  I'm sure there are entire blogs out there devoted to tea.  But I think, its better the learn by doing.  So if you get a chance, start buying some different kinds of tea and give them a try.  Nothing teaches like experience!
      

Friday, August 12, 2011

Mmm....Mmm....Mmm....Muffins!

1,000 Vegetarian Recipes by Carol Gelles is one of my favorite cookbooks.  If you think vegetarian food is boring then you NEED this book!  I stumbled across it at a used bookstore and to this day I can't figure out who would actually want to get rid of it.  There are simply too many wonderful recipes to name.  One of my favorites is her recipe for Zucchini Bread.  Most Zucchini breads are very dense and moist but this recipe is a fluffier, drier (without being too dry) version.  Unfortunately, I can't give you the recipe.  I'm sure that would be violating some copyright law or something.  What I CAN do is show you how I have adapted it.  Although her recipe is FABULOUS, I try to always do things a little healthier or a little "cleaner" if you will.  (If you aren't sure what Clean Eating is then you should check out my earlier post on Clean Cookies).  Please note that I like to make Zucchini muffins rather than bread because my kids love them (horray for veggies) and they are easier that way.  But you can still use my recipe to make bread if desired.  Obviously, just use a 9x5 bread pan instead of muffin tins.
I set out to change the original recipe up just a little and ended up changing it almost completely.  Thank you Carol, wherever you are, for being the springboard to my inspiration...

Zucchini Muffins Cleaned Up a Bit
  
Ingredients:
  • 1.5 cups All-purpose flour (I use King Arthur)
  • 1.5 cups Whole Wheat flour (I use King Arthur)
  • 1 tsp baking powder
  • 1 tsp baking soda
  • 1 tsp kosher salt
  • 2 eggs
  • 1 cup raw cane/turbinado sugar
  • 1/2 cup unsweetened applesauce
  • 2 tbsp lemon juice (fresh is best but....whatever)
  • 2 medium zucchini, freshly grated
  • 1-2 tbsp ground cinnamon (depending on how much you like cinnamon)
Instructions:
  • Pre-heat oven to 350 F.  If using muffin tins, either generously grease and flour them or use papers.  Even if you use papers I still recommend spraying the insides with some non-stick cooking spray.  This version tends to stick (from using applesauce instead of oil)
  • Whisk together the dry ingredients: both flours, baking powder and soda, salt and cinnamon
  • In the bowl of an electric mixer, beat the eggs on medium speed for 1-2 minutes, then beat in the cane sugar
Notice the Turbinado sugar is larger and has a brownish tint?
  • Next, beat in the applesauce
  • Next comes the lemon juice.  Normally, I use a wooden juicer for fresh lemons and then strain them using a small mesh seive.  I was watching Everday Italian one day and saw Giada just squeeze the lemon and drain it with her hand.  I wanted to look cool like Giada and tried it out this time.  Well, lets just say I got lemon juice in my eyes and seeds in my batter.  Not cool!  So, juice at your own risk!
Definitely doesn't look as cool as Giada doing it
  • Next mix in the grated zucchini.  I like to use a giant box grater to do mine.  
  • Lastly, turn the mixer down to low and slowly add the dry ingredients.  Spoon about 1/4 cup of batter into each section of the muffin pan.
  • Bake for about 20 minutes, until a toothpick inserted into the middle of one of the muffins comes out clean.
Makes about 2 dozen muffins
  • As tempting as it is....let cool completely before eating.  It sticks to the paper less that way!

Wednesday, August 10, 2011

Zinnias Gone Wild!


As I've said before, this is my very first year having a vegetable garden.  Like any good gardener-to-be, I did a little research before planting.  I knew I wanted to try and not use pesticides, so I looked into tips on "organic gardening."  Turns out there are good bugs (lady bugs, wasps, bees and certain types of beetles) and bad bugs (aphids, beetles, flies etc). when it comes to vegetable gardens.  The idea is to attract the good bugs so they will then deter/eat the bad bugs.  One way to do this is to plant flowers that attract the good bugs.  The most popular flowers people tend to use are Marigolds and Zinnias.  Their brightly colored blooms help attract bees that pollinate the other plants and lady bugs that eat aphids and flies.  I planted a little of both in my vegetable garden and they seemed to really help.  Of course there will always be insects but I think the Marigolds and Zinnias really helped cut down on any possible insect infestations!
As you can see my Zinnias have gone wild!  I had no idea they would grow as tall as they did....and if you cut them after their blooms start fading they spread like mad!  Most Zinnias are listed as growing anywhere from 12-30 inches.  As you can see some of my tallest have grown to over 40 inches!  Probably has to do with the Miracle-Gro garden soil...
Pinching off the stems really helps them spread!
So if you are thinking about having a vegetable garden next year, or have been having problems with insects in your current vegetable garden, consider adding some Zinnias and or Marigolds.  Burpee has a great information page on Zinnias.  Check it out: All About Zinnias

Late summer blooms!


Getting ready to BURST with color!
I was so glad this morning to see my gladioli (plural for gladiolus) or glads are starting to bloom!  I know, I'm corny.  I planted these on a whim in late May.  I found the corms (bulb-like structure) on clearance at Walmart and decided to give them a try.  As I've said before, I can't resist plants on clearance.  I truly didn't expect them to do much but to my surprise they are doing quite well!  Something I didn't know (until just now when I googled it) is that, apparently, you have to stake gladioli to keep them from falling over.  That makes sense now.  We had quite the storm last night and some of them are looking a little floppy.  I'll be sure to remember that for next year.
Presently, they are kind of interspersed in my front flower bed.  Next year I plan to create my own separate "cutting garden," so I'll move the bulbs there.  These flowers are perfect for cutting and bringing indoors.

Some interesting facts about gladioli:

  • Of the Iris family, or "iridaceous" (I think that's a cool word)
  • The word "Gladiolus" is Latin for "little sword"
  • Glads are not hardy here in Zone 5, so you plant the corms in mid May and dig them up again in late September, then store them inside until they are ready to plant the following May (ideally a cool garage or refrigerator, just don't freeze them)!
  • During the summer, new corms form under the old corms.  You remove these old corms in the winter and discard
For being such a showy flower, they are relatively low maintenance.  I've practically ignored them since planting (other than some occaisional fertilizing) and they are doing well.  So next spring if you are looking for an easy and elegant flower to add to your garden, maybe try some glads....I bet you'll be glad you did!  (I know I am)! 

Sunday, August 7, 2011

Will All the Martha Fans Please Stand Up...


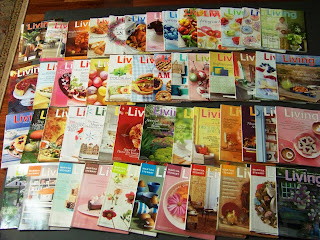
It's the most wonderful time of the month and NO I'm not talking about Mother Nature's monthly gift.  I'm talking about the day each month when I receive the newest issue of Martha Stewart Living.  September's issue came in the mail yesterday.  I have a ritual when I get a new "Martha" (as I affectionately call my MSL magazines).  I go into my room, close the door (no kids allowed), snuggle up with a nice cup of coffee and slowly flip through all the pages.  My family is starting to learn that this is "my time" and that they probably better not interrupt unless someone loses a limb.  I absolutely love Martha Stewart.  She is the inspiration behind domestically inept.  Its me....trying (and failing) to be Martha Stewart.  Even if you're not a crazy Martha Stewart freak like me, I think you could still benefit from her magazine.  Unlike most junk magazines out there....Martha Stewart Living is full of very practical information.  Recipes, cooking and cleaning tips, gardening and craft information.  And don't get me started on the photography.  The pictures alone are worth the subscription.  
My Marthas
I get so much inspiration from my Marthas.  I only started subscribing a few years ago and have since started buying back issues.  I periodically go through some of them and every time I pick up an issue, no matter how many times I've looked at it, I still learn something new!  The subscriptions are usually pretty reasonably priced and they make wonderful gifts!  So if you haven't discovered Martha....I suggest you do.  

Saturday, August 6, 2011

Some Like it Hot...

This summer has been exceptionally hot and humid and most of my plants are struggling to keep up.  Even with daily watering they are looking pretty sad.  I'm happy to report there are a few exceptions.  Below is a picture of my Mexican Male Fern, which is one of the few plants I have thriving in this un-Godly heat.  Who new a Mexican fern would thrive in southwest Ohio???  I just planted it this spring and according to plant tag its hardy to Zone 5, but we'll see if it survives the cold Ohio winters.  We have a saying here in SW Ohio....the only predictable thing about the weather is that you can't predict it!
Mexican Male Fern...thriving in the summer heat
Another one of my plants that is thriving is some Munstead Lavender I planted by my porch.  This was kind of an impulse buy.  I can't resist clearance plants and I got 3 pots of Munstead Lavender for about $2.00.  The only problem with clearance plants is you then have to find a place to put them.  I finally settled on a place close to my porch.  Hopefully it works out.  Since they were on clearance...you can imagine they looked pretty sad.  I wasn't sure if they were going to make it and in fact 1 of the three is dead...or mostly dead.
Mostly dead Lavender
Not to despair!  The other two are actually starting to turn around!  After poking around on the internet, I found out that Lavender actually does quite well in high heat.  It's native to the Mediterranean area.  Now I know SW Ohio is a far cry from the Mediterranean but I'm still going to give it a shot.  After all, Lavender is such a wonderful plant with so many uses.  I think I'll leave the dead one in the ground for now....after all it is a perennial and sometimes they surprise you.  It might come back next year.  
Lavender making a comeback!
As my friends and family will tell you I pretty much never by annuals.  Planting and replanting year after year seems like a lot of work, not to mention a waste of money.  However, I broke my own rule this year and decided to plant some wave petunias out by the mailbox.  This area of the yard receives full sun all day.  There aren't too many plants around these parts that can stand up to that kind of heat.  Well wave Petunias are certainly one of them!  They've gone absolutely viral over there.  And they don't call them wave for nothing....these things spread like mad!  
Purple wave Petunias
Of all the plants I have, these are by far doing the best in this scorching heat.  I guess some really do like it hot!

Thursday, August 4, 2011

There's a reason its called "Miracle" Gro

Small Sampling of Our Tomato Harvest
Its harvest time around our house and we've got more tomatoes than we know what to do with.  This is the first year I've had a garden. I usually manage to kill things right away but I must say my garden is doing particularly well. My husband was kind enough to build me a 4' x 8' cedar box. I decided to splurge and purchase Miracle-Gro garden soil for it. WOW! I'd like to say that I'm a fantastic gardener but I think the secret to my success is probably the soil. Lets just say I have "tomato jungle" going on.

My hubby, standing next to "Tomato Jungle"
A co-worker of mine said he used to have a garden but he got tired of having a bumper crop for a few weeks and then nothing....Well the key to that problem is successive sowing and not planting everything at once.  I started a few plants indoors ahead of time, some I planted directly outdoors when it finally got warm and then I just bought a few Bonnie Plants from Lowe's.  So far, the plan is working.  We've been harvesting tomatoes for weeks now...with no signs of it stopping!  Wondering what to do with all those extra tomatoes?  Well you could give them away...but I like to reap the benefits of my labors.  I've started making homemade spaghetti sauce to freeze.  Its so easy....a domestically inept person can do it...which brings me to my next topic:

Peelin' Maters':

The first step in making your own spaghetti sauce is to peel the tomato.  Here's how you do it...its so easy I promise:
  • First wash your tomatoes and mark an "x" on the end opposite the stem with a paring knife
"X" Marks the Spot
  • In a large stock pot, bring about 6 cups of water to a rolling boil
  • While you are waiting for the water to boil, prepare an "ice bath" (and no this isn't to rest your weary feet).  You do this by filling a bowel with ice water.  I know...so hard.
  • Once the water is boiling start plopping your maters' in there a few at a time.  It only takes about 30-60 seconds for their skins to start peeling.  
"Its gettin' hot in here!"
  • As soon as this happens, remove them from the boiling water (using tongs) and plunge them into the ice bath. 
See the skin loosening off?
  • Remove the maters' from the ice bath and the skins will peel right off.  
Like taking candy from a baby
  • You can use this same procedure for removing the skins from peaches if you want to make your own peach jam (which I highly recommend because its awesome)
Now you are ready to proceed with making your own spaghetti sauce....which will be covered in a later post!  


Wednesday, August 3, 2011

The Fastest, Easiest Way to Frost a Cupcake

Yummy Cupcake!
So easy...a domestically inept person could do it!  Well after many years of trying (and failing), I've finally stumbled across a great way to frost cupcakes.  Come on moms, we've all been there.  Its 11:00pm and you have to have about 2 dozen cupcakes ready for your kid's class tomorrow.  Well, no more late nights frosting!  No need for spatulas....all you need is a piping bag (a really big one) and a HUGE tip.  Below is a picture of an 18 inch canvas piping bag and a large star-shaped pastry tip, #826. 
18 inch canvas piping bag & #826 tip
 To give you an idea of how big this tip is compared to the usually sized tips, check out this picture below:

An Ateco #826 v. a Wilton #21 tip

All you have to do is put the tip in the piping bag, fill it with frosting, make a few swirls on top of the cupcake and you are done!  You can frost dozens of cupcakes in no time!  Below is one of the best recipes I've found for homemade buttercream frosting.  Better yet you can make it ahead of time and refrigerate it for a few days before you need it.

Homemade Buttercream Frosting

Ingredients:
  • 1/2 cup shortening
  • 1/2 cup butter, softened
  • 1 tsp vanilla extract
  • 4 cups powdered sugar
  • 2 tablespoons milk
Instructions:

  • Cream together the butter, shortening and vanilla using an electric mixer on medium speed
  • Turning the mixer speed down to low, slowly add the powdered sugar
  • Once all the powdered sugar is incorporated, add the milk
  • If desired, add coloring
The above recipe will frost about a dozen cupcakes using the piping method describe above. 

Monday, August 1, 2011

Homemade Bread

Homemade Honey-Oat Bread
Failure, I call it "pac-man bread"
About a year ago I was talking to a friend and she was telling me about how her sister lives in Hawaii and because things are so expensive over there she makes her own bread.  I was fascinated.  People actually still make their own bread???  Sure I've done it before for special occasions, but on a regular basis??? "That must be too much work," I scoffed.  Then I did a little research....turns out a lot of people out there do it!  Turns out....its not even that hard!  So for over a year now I've been experimenting with making my own bread.  I've had quite a few failures....


But, I've finally landed on a good and healthy recipe.  I decided to share:

Honey-Oat Bread
Ingredients:
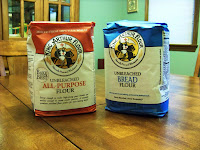
This is what the pros use!

  • 3 cups whole wheat flour
  • 3 cups white bread flour
  • 2 tsp coarse salt
  • 4 teaspoons instant yeast
  • 4 teaspoons vital wheat gluten (optional)
  • 4 tbsp oat bran/oats/wheat bran/wheat germ
  • 1&1/3 cup lukewarm water
  • 1 cup of low-fat plain yogurt
  • 2 tbsp vegetable/safflower oil
  • 2 tbsp honey (local honey is the best)!
  • Egg for brushing
  • Oats for coating

My favorite brands to use
Instructions:
Dough Hook
  • Mix together the flours, salt, yeast, wheat gluten (if using), and bran in the bowel of an electric mixer 
  • Make a well in the center and add the water, yogurt, oil and honey
  • Using a dough hook (or feel free to mix by hand) mix together on medium speed till dough starts to leave the sides of the bowel
  • Switch mixer to a little higher speed and mix on this speed for about 8 minutes (this mimics the kneading process, again you can do this by hand)
  • The dough should come together to form a nice clump that can be shaped easily. Slacker (wetter) doughs will rise more but are harder to work with.  If you feel your dough is too wet, then add a tablespoon of flour at a time till it comes to the consistency you want.  If you feel your dough is too dry, add a tablespoon of water at a time.  
  • Brush another bowel with oil.  Remove dough from mixer and shape into a ball.  Place ball in oiled bowel and cover with a damp dishcloth.
  • Allow dough to rise for 1-2 hours.  
  • After rising, turn the dough out onto a slightly floured surface and knead for1-2 minutes by hand
  •  Rest the dough for 5 minutes
  • Shape the dough as desired (a boule or log is the easiest)
  • Once shaped, place the dough on a sheet of parchment paper, cover with a damp towel and allow to rest 1 more hour
  • Towards the end of resting period, pre-heat oven to 425 F with a baking stone placed in the oven (if you have one)
  • If desired, make an egg-wash by beating an egg and mixing it with a little water.  Then use this to brush onto your bread.  That will give it a nice shiny appearance.  You can also use plain water if desired. Then sprinkled some loose oats over the top of the bread.
  • Use the parchment paper as a "sling" to transfer the dough to the oven and onto the baking stone (no need to remove the parchment paper).  If you don't have a baking stone a cookies sheet will do.
  • Throw a couple of ice cubes in the bottom of the oven (to create steam) and allow bread to bake for about 35-45 minutes
  • Bread is done when it sounds hollow when tapped on the bottom.  
I know this seems like a lot of work but you'll get the hang of it and once you do it will be a cinch.  This recipe makes one LARGE loaf or two smaller loaves.  This has become our go-to bread for sandwiches and toast.  As you get to play around with the recipe you'll realize there are lots of opportunities for variations.  I'd love to hear your ideas!